
Did you know, the Site Editor automatically saves all the changes you make to templates or styles in the database? This feature comes in handy during the building process, allowing you to experiment and fine-tune your website design. However, there comes a point when you want to apply those changes directly to the theme itself.
In the past, this required a multi-step process involving the Export function:
- Export the theme.
- Unzip the exported file.
- Copy the files from the export directory into the theme directory.
Thanks to the Create Block Theme plugin, you can now save changes from the Site Editor to your theme with just a single click!
Whether you’re a developer looking to customize themes or a website owner aiming to personalize your site, this plugin empowers you to effortlessly sync your changes with your theme. It’s a game-changer that simplifies the process and saves you valuable time and effort.
How to save changes made in the Site Editor to your block theme:
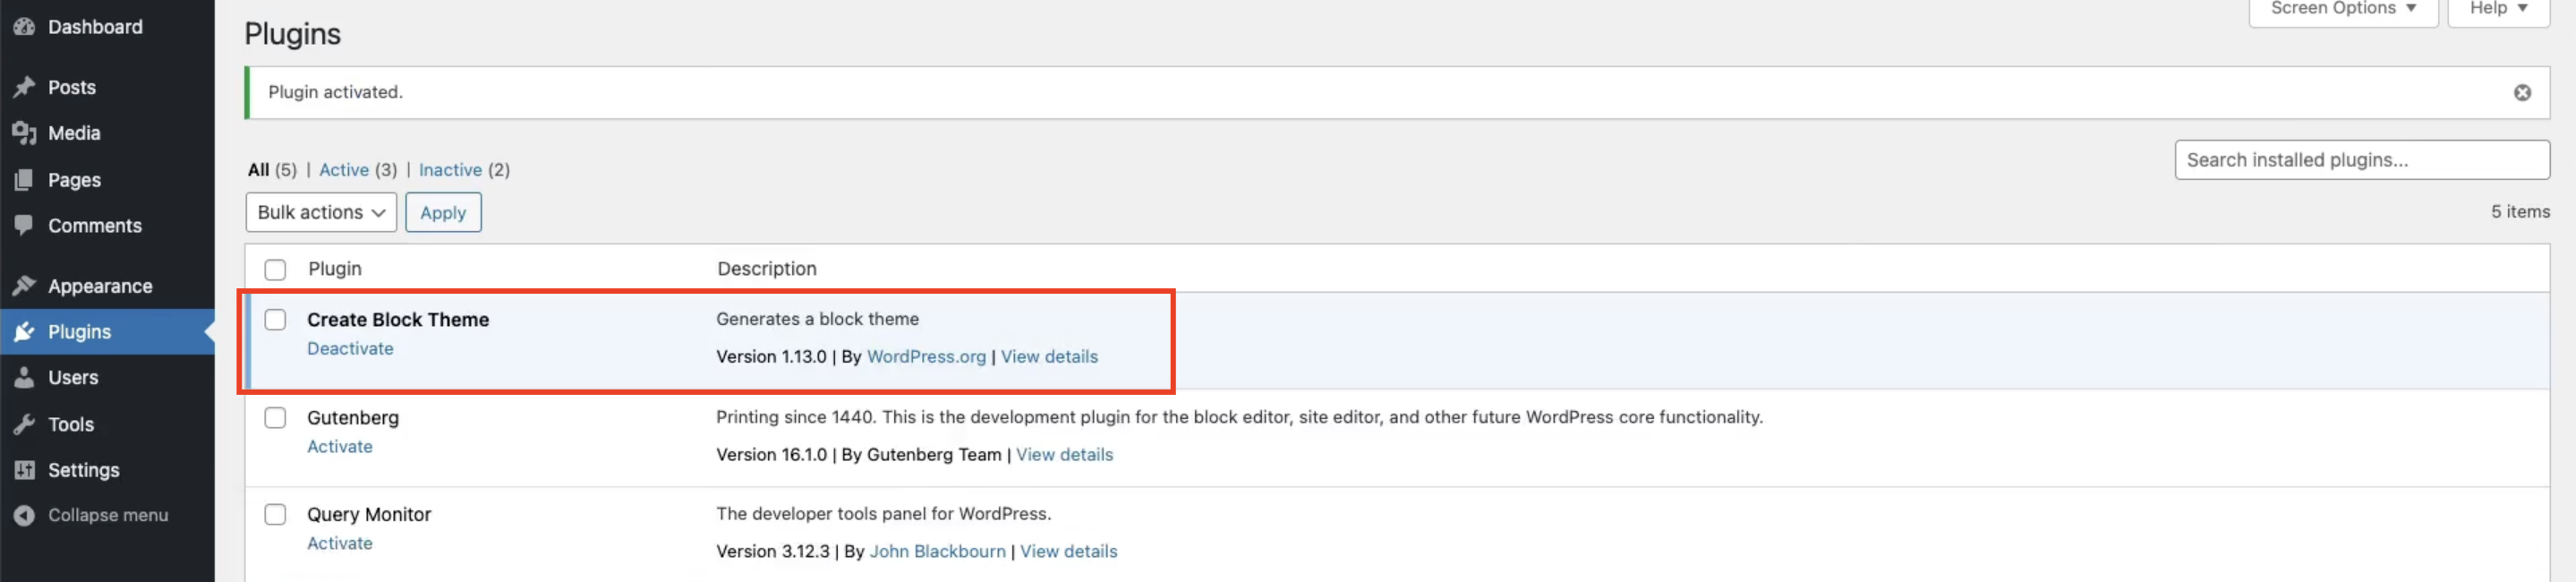
1. Firstly, Install and activate Create Block Theme plugin.
2. Once the plugin is activated, navigate to the Site Editor in your WordPress dashboard. You can access the Site Editor by going to “Appearance” -> “Site Editor”.
3. Make the desired changes to your templates or styles using the Site Editor interface. Customize the layout, colors, typography, or any other aspect of your theme to suit your requirement.
4. At the right top of Site Editor, Click on 🔧 button and it will open a side menu similar to that shown in the image below. Lastly, Click on Save Changes.
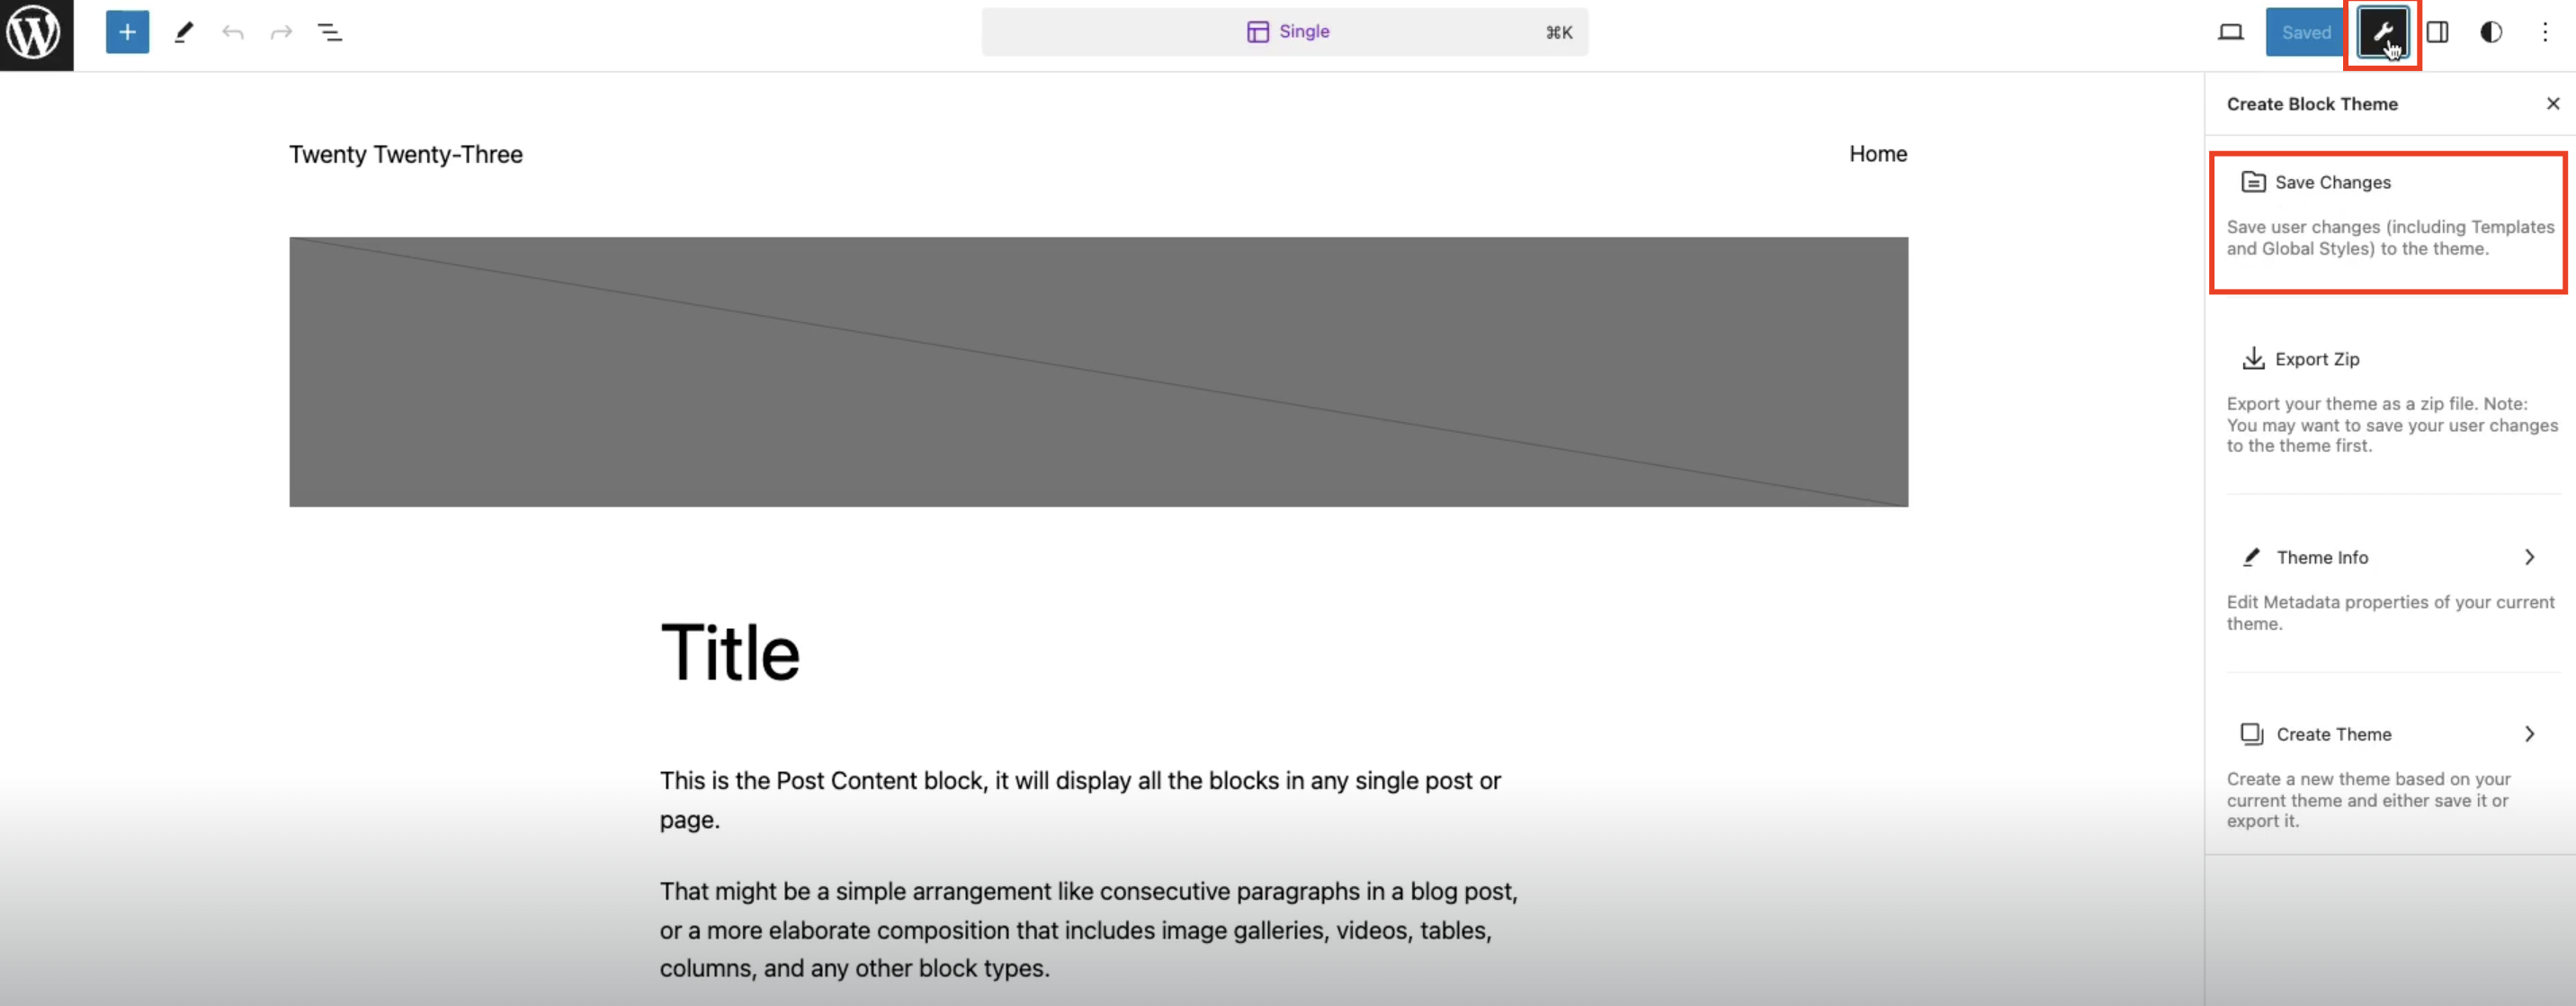
Once you click the Save Changes button, the Create Block Theme plugin automatically applies the changes to your theme files, eliminating the need for manual export, unzipping, and file copying.
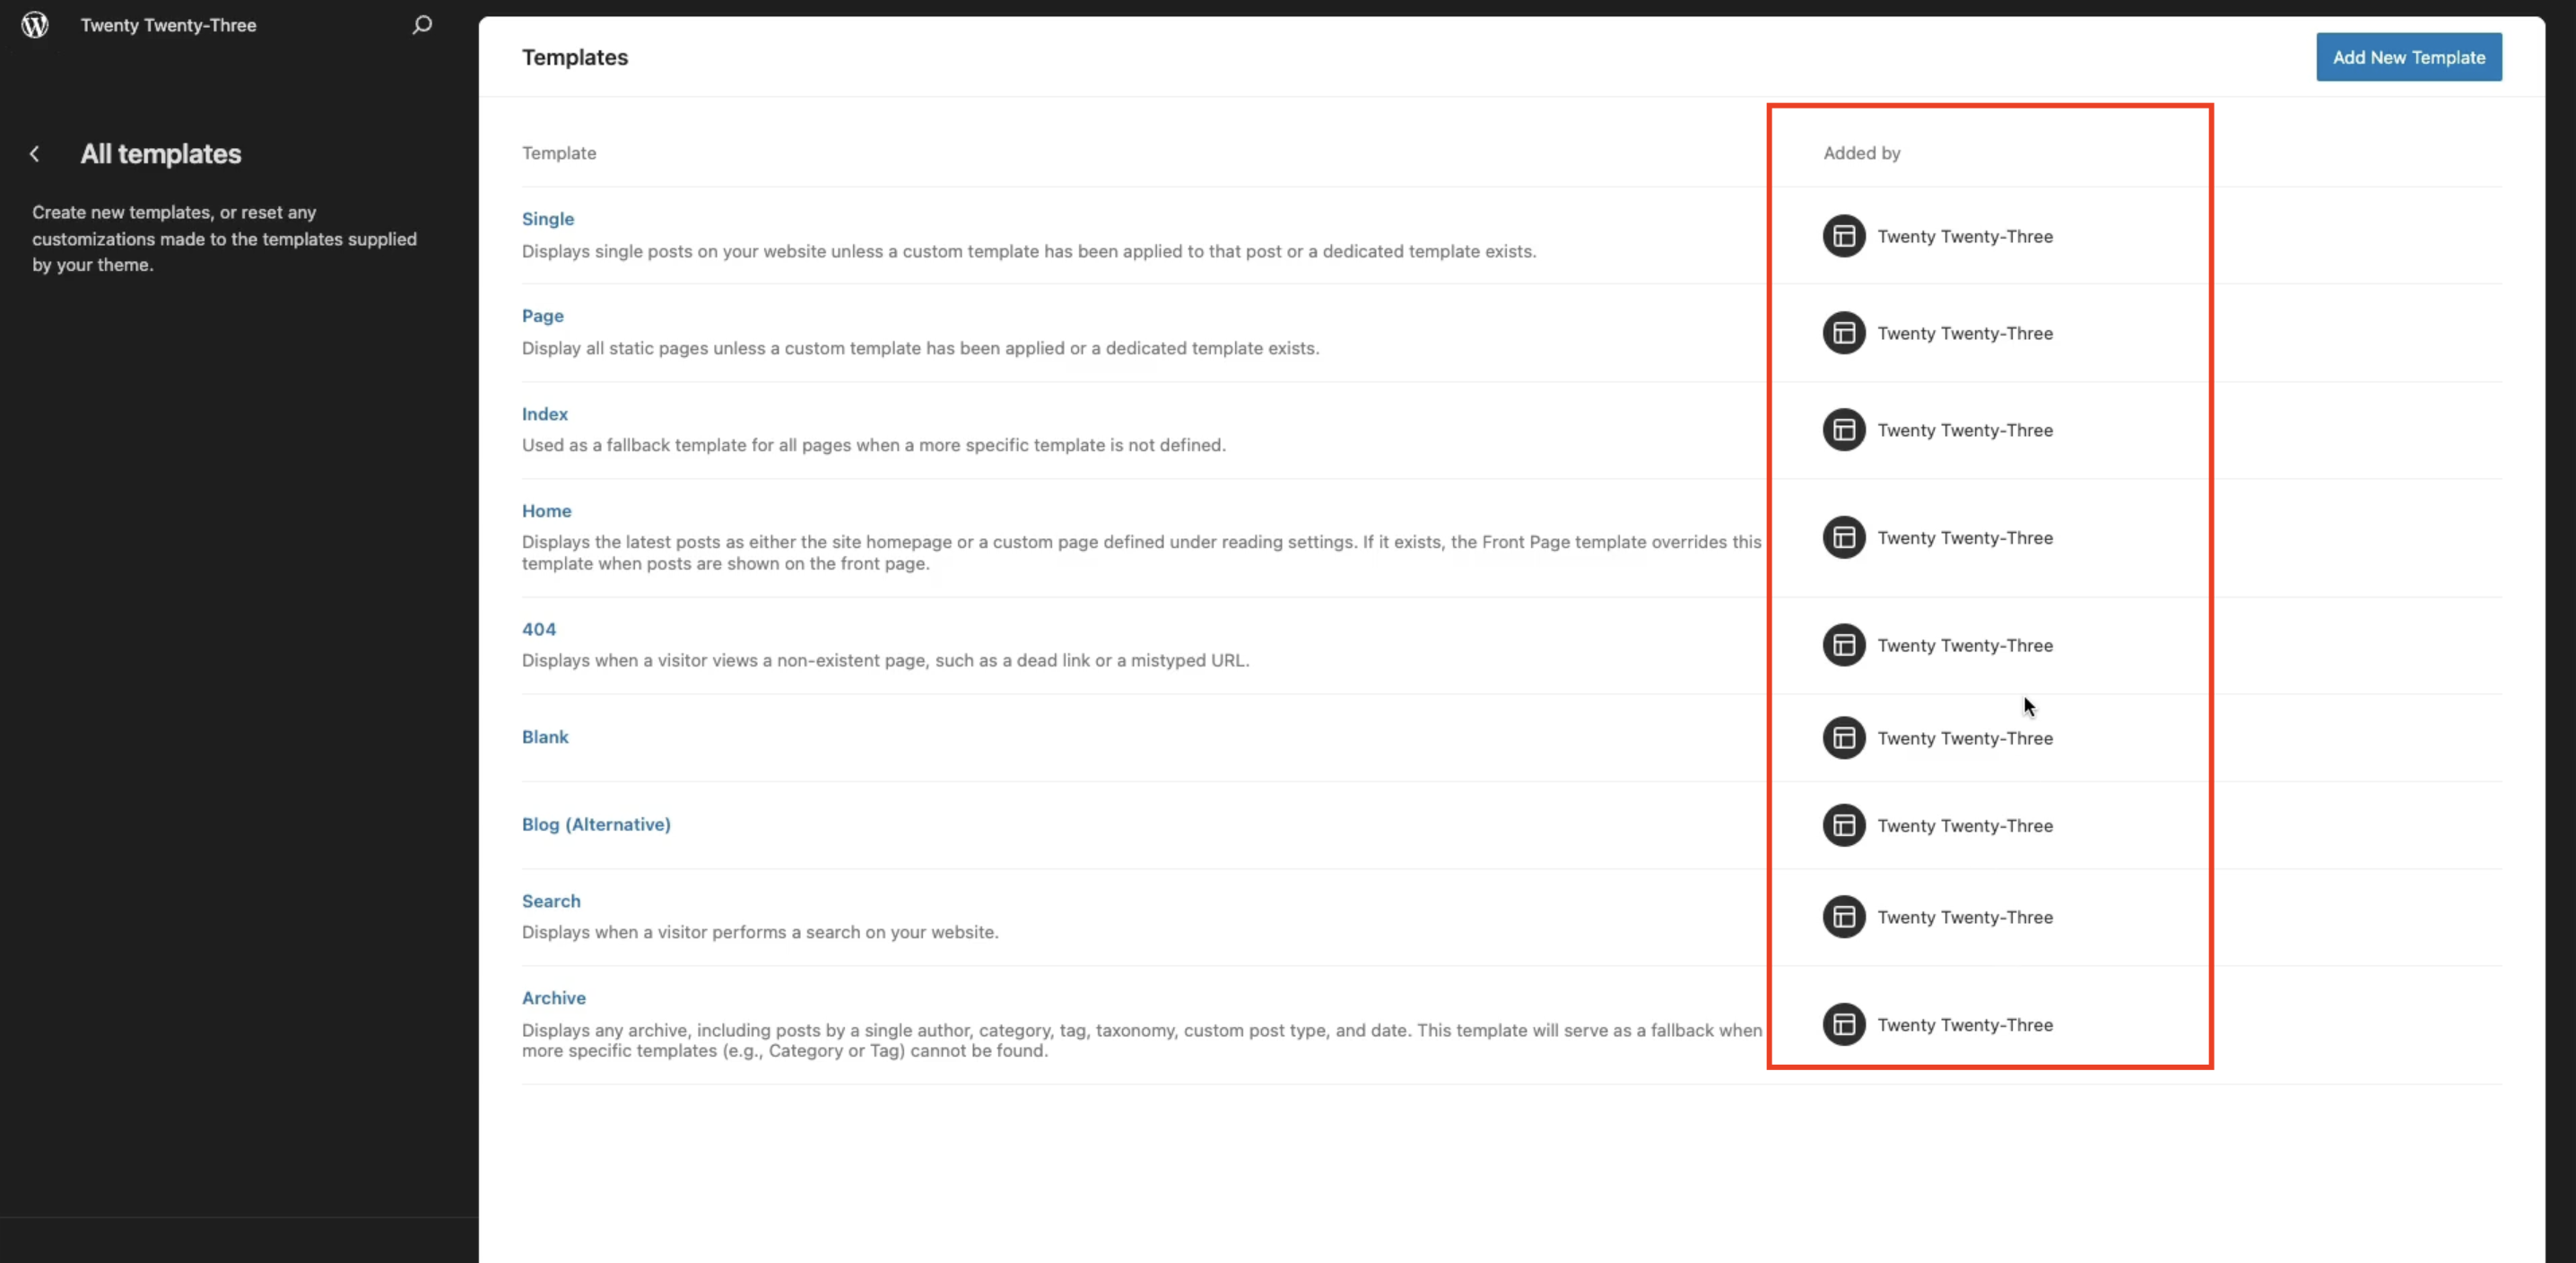
Additionally, It deletes all the changes that we did from the database. Check the screenshot below.
That’s it! Your changes are now successfully saved to your theme. 🔥
Leave a Reply